NOTE: You take responsibility for any consequences as a result of altering your computer. You are liable for your own screw ups.
This is written for someone with not much experience in changing computer components, like myself.
I'm going to break it up into several posts, and start with the simplest step:
This is really very easy. You can find information (which I will share here as well) in the manual on pages 20-21 on how to upgrade the RAM. Taking the new RAM out of the retail packaging will probably take more time than actually inserting it.
I used Crucial 2GB 256Mx64PC2-5300 CT25664AC667 DDR2 200-Pin SODIMM Laptop Memory, which I purchased on Amazon for about $30. People have reported successfully using a 4GB RAM module as well. Note that 32 bit windows operating systems can only recognize ~3.4 GB RAM, and the system comes with two, so unless you are planning on changing to a 64 bit operating system, there is no point in getting more than an additional 1 GB of RAM.
Panasonic Manual: Upgrade Memory Page 20, Inserting the RAM close up and Page 21
(I left the images huge, so hid them behind links).
Unplug your W8 from the AC adapter, close the lid, flip over the computer, and remove the battery.
Optional: Generally, I always wear my anti-static wrist band when messing with computer components. You can also just occasionally touch a grounded item (a piece of metal on the computer for instance) to discharge any static electicity, but I'd rather be safe than sorry.
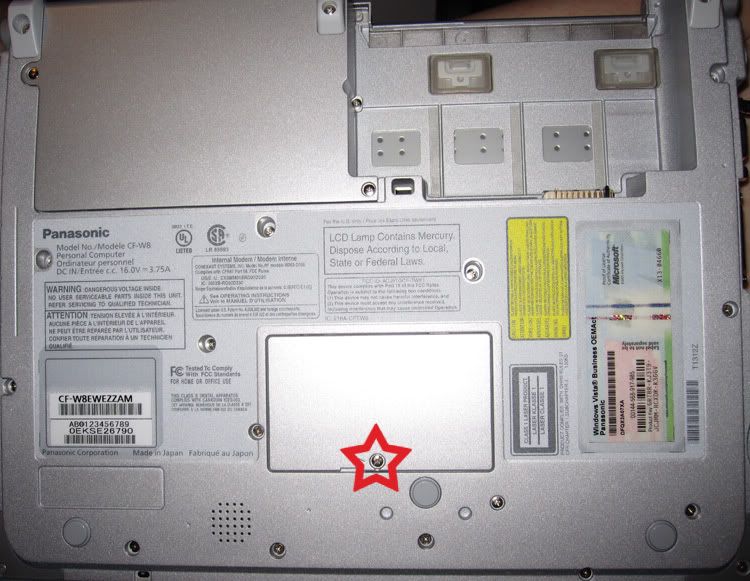
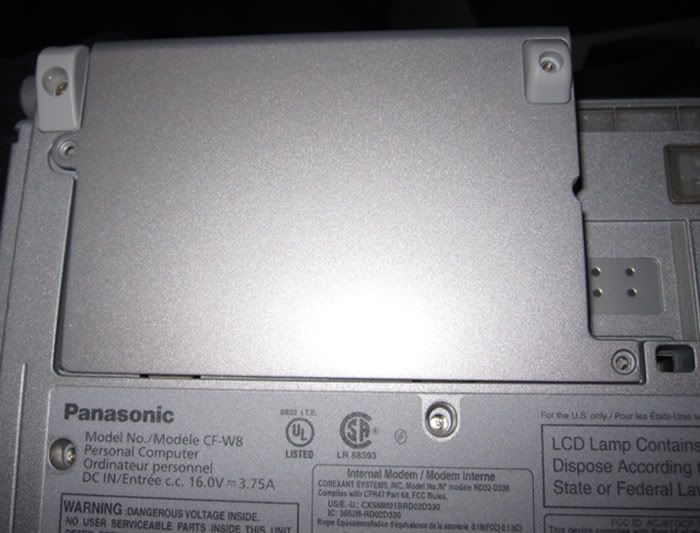
See the red star? That's the screw you need to remove. It kind of looks like a phillips, but it is not, use a flathead screwdriver unless you have a fancy screwdriver that has that particular shape.
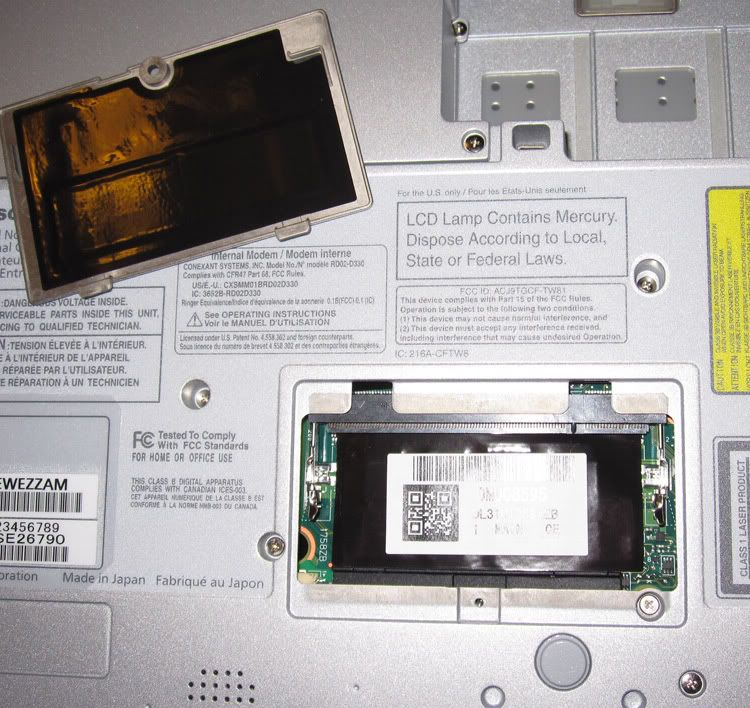
Remove the screw, and flip up the cover. There's a little notch on the bottom, stick a fingernail in that and it will pull right up.
Now it will look like this:
Have you looked at the manual? DO IT BEFORE YOU PROCEED (unless you already know what you are doing, but then you shouldn't even be reading this).
I don't have pictures of this step because I only have two hands.
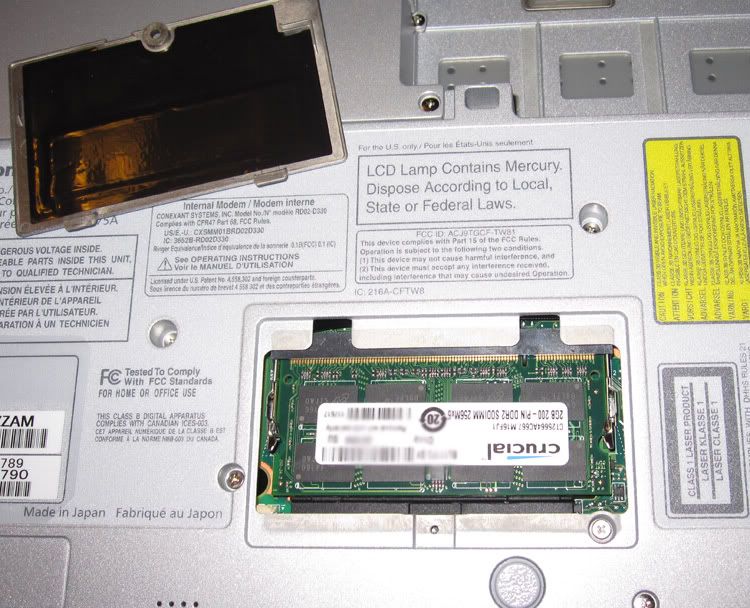
Line up the notch in the RAM with the protrusion in the plastic (look at everything first!), and insert at about a 30 degree angle (please look at the manual, it describes this better and has diagrams). Insert until you can no longer see the gold terminals, then slowly press it down until the tabs click into place. If you feel like you have to force it in, STOP, and make sure you have it as in as far forward as reasonably possible.
It looks like this after the tabs have popped closed.
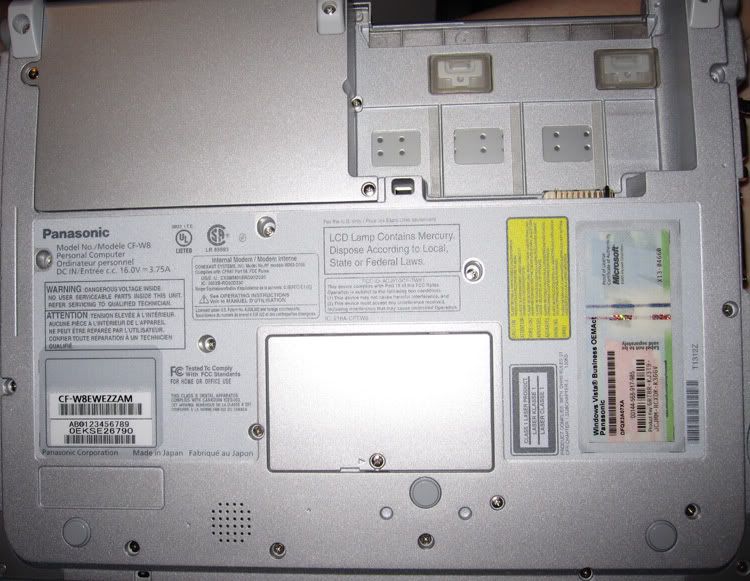
Replace the cover and the screw, and it will look... well, exactly the same!
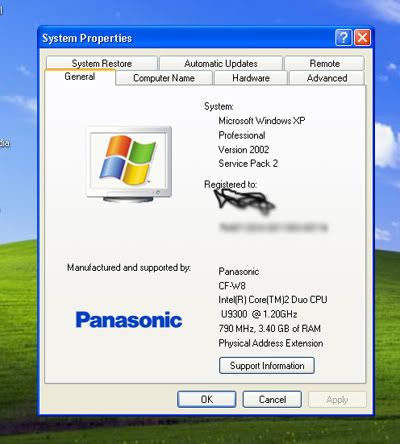
Recommended: verify that it was a success. Reattach the battery or the AC adapater, flip her back over, and verify that the RAM has been recognized by your computer. (Turn it on, right click on Computer/ My Computer and select properties. If you haven't yet upgraded the OS (still 32 bit Windows XP) it will show 3.40 GB RAM (with a 2+ GB RAM module).
If it doesn't show the RAM, repeat the above steps and make sure that you installed the RAM correctly, and that you are using the correct type of RAM (which is also listed in the manual).
Coming up next: Upgrading the Hard Drive!
Reply 1 : Panasonic W8: Upgrading RAM, Harddrive, and Operating System to Windows 7 64 bit.
The W8 (from my deal) came with a 160 GB hard drive. I probably could have lived with it, at least for a few years, but I decided that if I was going to upgrade, I might as well do it now, rather than have to go to the trouble of saving and backing up all my data from this hard drive in a few years.
I used a Western Digital Scorpio Blue 500 GB 2.5 inch Hard Drive, 8 MB Cache, 5400 RPM SATA, that I also got from Amazon. It had good reviews, and was about $55.
With hard drives, try not to touch the circuit board or the connectors (the gold areas).
Directions:
Once again, remove the AC adapter, and the battery. Pay more attention to discharging static this time around (if you aren't using the anti-static wristband), it takes longer than the RAM and it seems like it'd be easier to screw something up if you shock it. This is still not a very challenging thing to do, though.
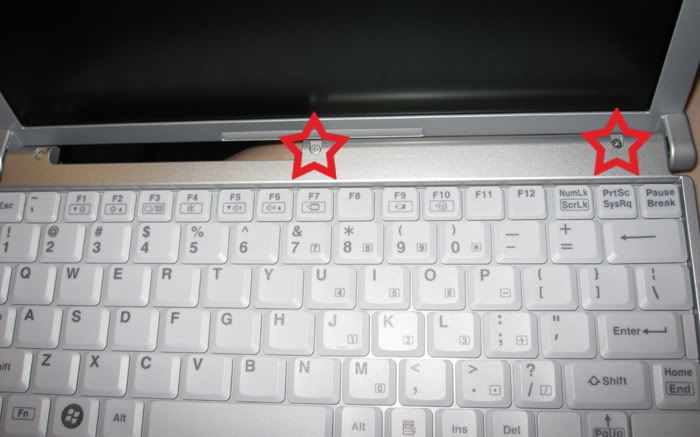
This time, there are 6 screws to remove, but this time they are all phillips head. Before you even flip over the laptop, there are two screws to remove (by the right side, the two screws right below the screen).
Close the screen, and flip the laptop. Here are the other four screws you need to remove. Be sure to keep them in a safe place!
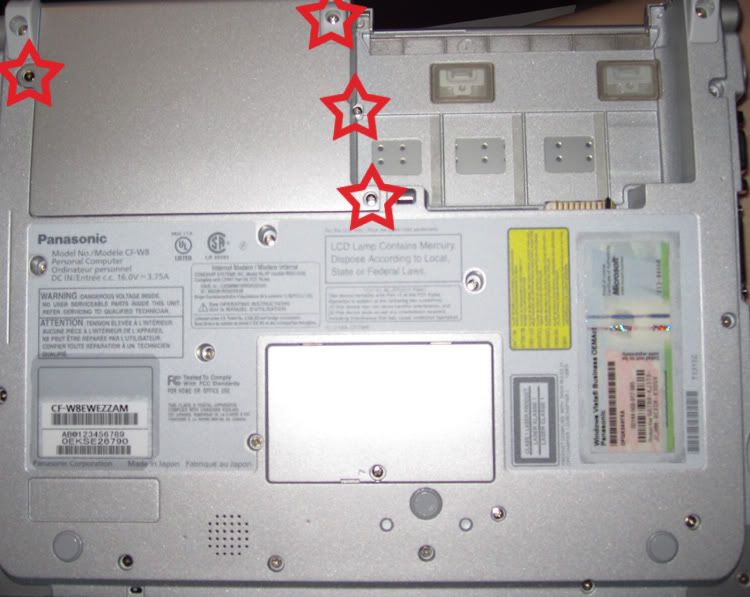
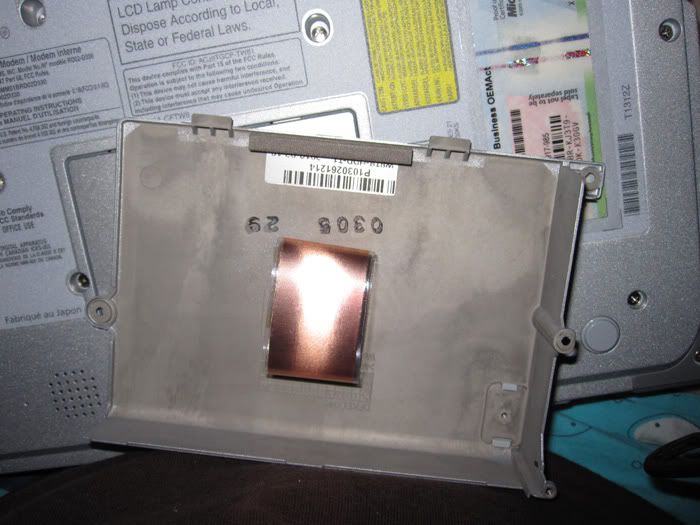
When you have removed all the screws, you should move the cover to the right, and then lift. If you are having a hard time removing it, be sure that you got all of the screws.
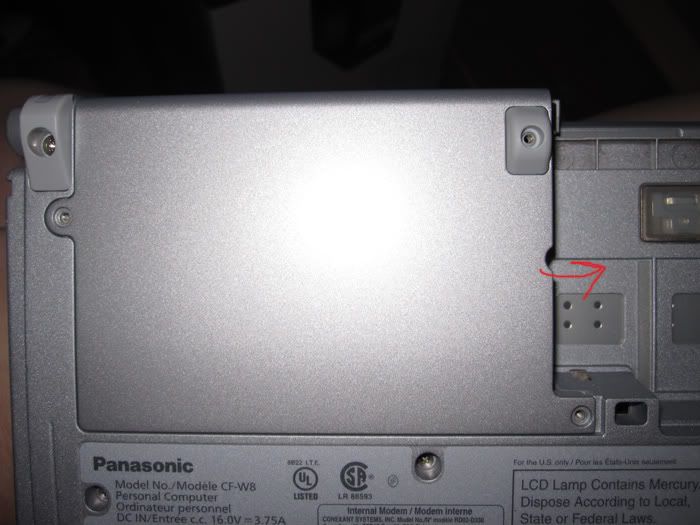
The cover from the bottom:
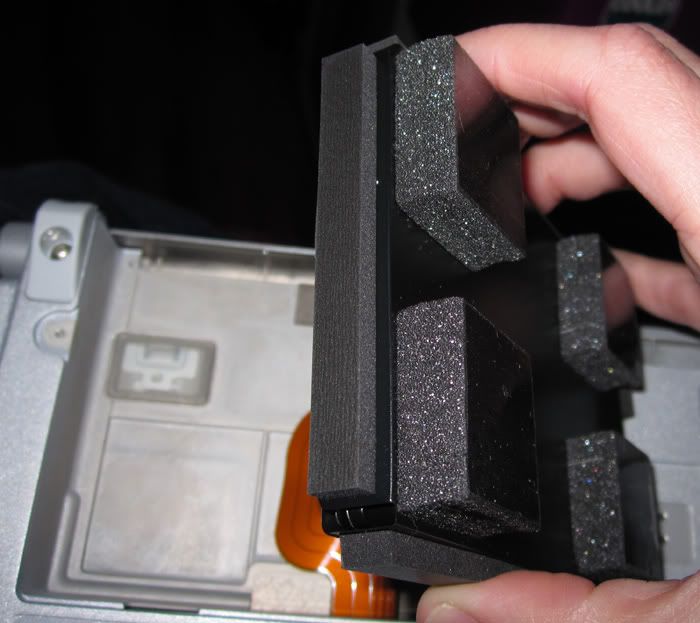
What it's going to look like inside:
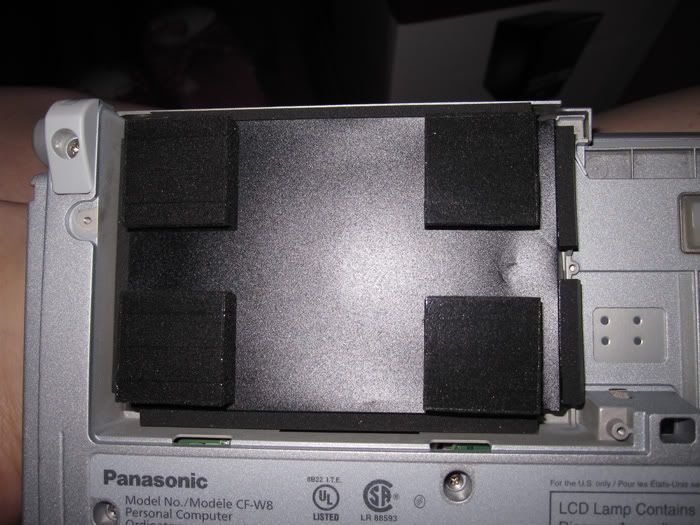
To understand what you are looking at, there are four foam pads on the bottom, and that is a sort of black plastic bag, with the foam attached.
There is nothing holding the hard drive down, no screws or anything (I guess that's why there are 6 screws on the cover), so you can simply pick it up and flip it over. Now it'll look like this.
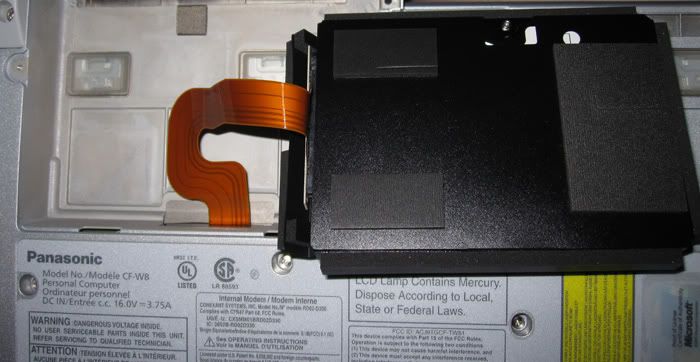
That cord is your sata cord, and you can see it connected to the hard drive. You can either pull the hard drive out of the padding now (you want to pull it from the side where you can see the SATA cord attached, because it is the only way to get it out) or you can detach the SATA cord and then remove the hard drive from the padding.
Disconnecting the cord is not difficult, just gently wiggle and pull the connector from the hard drive. Then attach the new hard drive.
Now, slide (gently!) the new hard drive into the foam jacket. Pay attention to the orientation
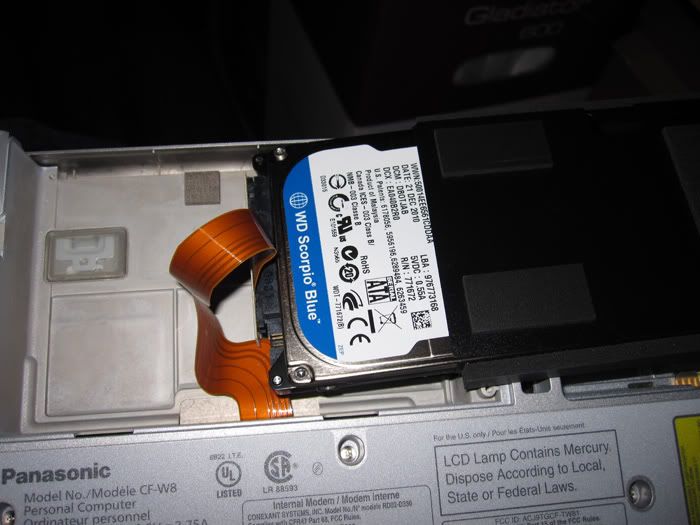
the thinner foam padding (on top right now) should have the metal shielded section of the hard drive against it. This is so the cord is not bent oddly when it is put back in place. No need to stress the cord.

Once you have it all the way back in
Go ahead and flip it back over (look and make sure the cord is laying nice and flat)
Get everything back the way it was
And put the cover back on.
You'll have to push it down and over, and probably hold it down while you put in the first few screws.
By the way, the two longer screws go on the top, there are 3 short screws, and the screw with a thicker "top" section goes in the little leg on the bottom.
Now, you'll either need to reinstall the operating system on your new hard-drive, or install a new one.
Next: Installing an Operating System!
Reply 2 : Panasonic W8: Upgrading RAM, Harddrive, and Operating System to Windows 7 64 bit.
First, if you are installing an "Upgrade" version of Windows 7 (as I was) you will have to reinstall Windows XP from the recovery disk included with your computer. Yes, it'll take about 30 minutes, but I don't know of a way around it.
First, however, you have to be able to put the disk in, and read it!
So, you have everything screwed back together, and everything looks hunky dory? Go ahead and reattach the battery/ AC adapter, flip your computer back over, and turn it out.
Now, hit the F2 button when it starts booting up. Keep hitting it, there is a notification on the bottom that will tell you to hit F2 for setup, and that is what you need.
You'll start out on this screen.
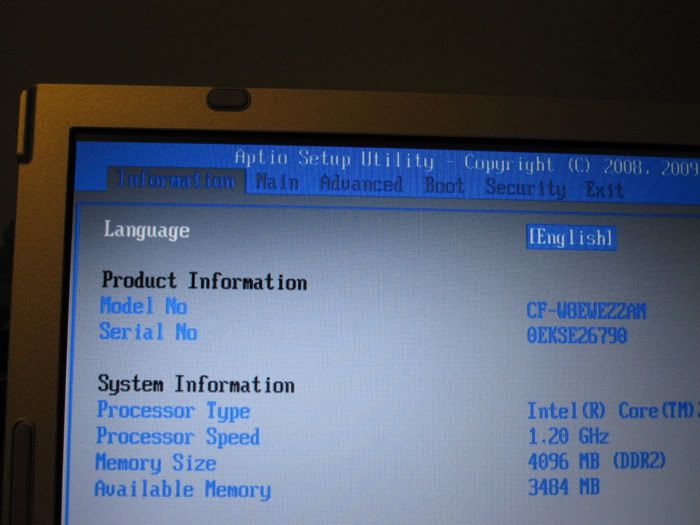
See the tabs on top? You need to go over to the "Main" tab, and change Optical Drive Power to "On" (it defaults to Off).
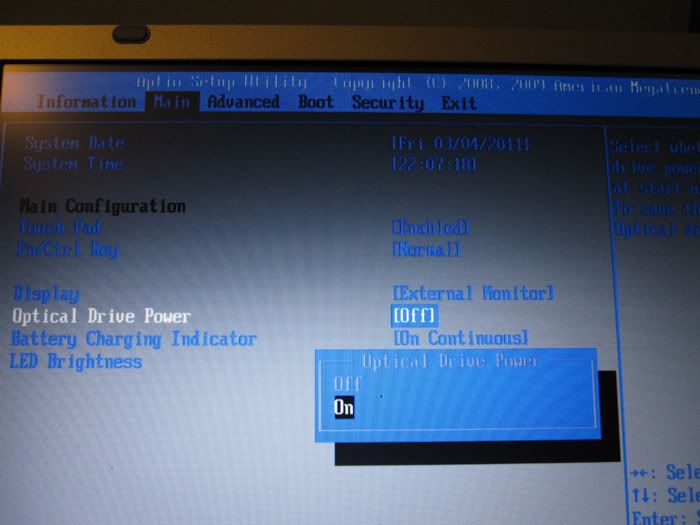
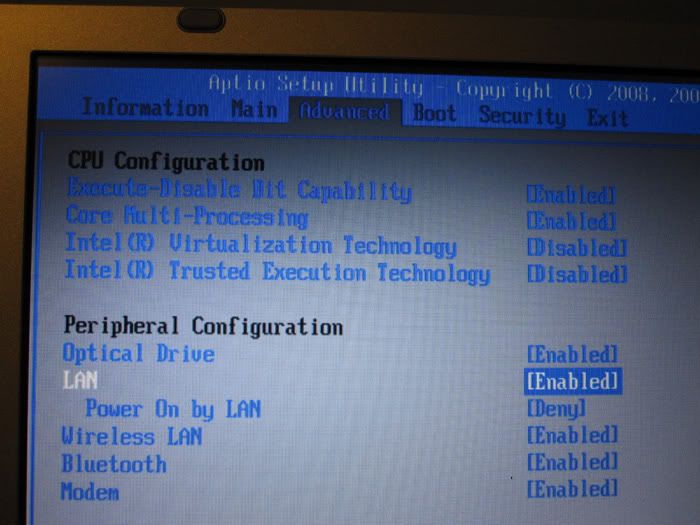
Now go over to the "Advanced" tab, and turn Optical Drive to Enabled.
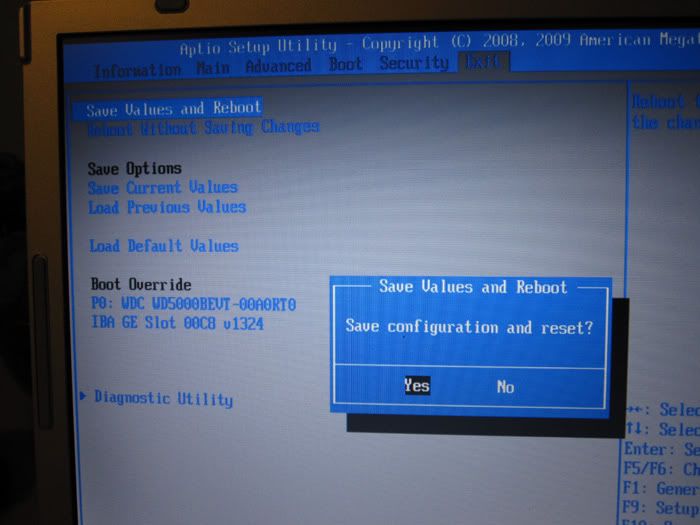
You can play with the Boot order if you want, but you don't need to. Go over to the Exit tab, and hit Save Values and Reboot.
Once it reboots, you will be able to open up the optical drive and insert the operating system CD (either one of the Windows XP or Windows Vista cds that came with the laptop, or if you have a full install of another operating system, you could install it now with the optical drive.
It will then boot from the CD and install the OS. Follow the directions.
So, once you have XP installed, if you want to go to 64 bit Windows 7, you will need to reboot again. You will need to install it going from the F2/ Setup menu again, so once again, when prompted, hit F2.
Go over to the Boot tab. This is the order it will look for boot information from, normally floppy drive is first.
Change the order so Optical Drive is listed before Hard Drive. (sorry, I didn't take pictures of this). Put your Windows 7 64 bit CD in now, if you haven't already.
Go to the Exit tab and Save and Reboot again.
Now Windows 7 will start to install. Follow the prompts.
The install generally goes very well. Windows 7 will not find a few drivers, though (most noticably the touch pad driver that allows for the circular scrolling).
I'm going to address how to do that in the next post, because I need a break!
Reply 3 : Panasonic W8: Upgrading RAM, Harddrive, and Operating System to Windows 7 64 bit.
Toughbook drivers
First, don't be dumb like I was at first. Follow the installation instructions, it is a PDF file that will tell you what to install first. It will make your life much easier. It also will tell you how to install them.
Do a search in the website provided for "f9" in the text box. For step 1 (required) hit "All Drivers". You can also narrow it down to your operating system (in my case, Windows 7 64 bit) in step 4.
Do the search, and one of the first things that come up is installation instructions.
So, first you need the OS INF driver installed. Search for "OS INF f9" and the file that comes up should be the one you need (double check the file name in the Installation Instructions).
Note that the installation instructions also tell you how to install it (in this case, by running setup.exe) and where the file is unpacked (you can copy and paste this into a windows address bar to be taken to the location).
Lather, rinse, and repeat for the utilities listed in the Installation Instructions.
(If anything, it is even more tedious typing this out then it is doing it, so please just follow the directions as given in the installation instructions, and you will be fine).
Note: the Sound Driver would not install for me, but the sound works fine.
To regain the touch pad circular scrolling (after you have done the steps listed in the installation instructions!), change "All Drivers" in Step 1 to Keyboard, Mouse and Peripherals, and download the wheel pad utility and the touch pad driver. (First two that come up on the list when you search for f9).
At this point, there should be no unidentified devices left in device manager, and everything should be working better than new!
Good luck!
Reply 4 : Panasonic W8: Upgrading RAM, Harddrive, and Operating System to Windows 7 64 bit.
Reply 5 : Panasonic W8: Upgrading RAM, Harddrive, and Operating System to Windows 7 64 bit.
Reply 6 : Panasonic W8: Upgrading RAM, Harddrive, and Operating System to Windows 7 64 bit.
Reply 7 : Panasonic W8: Upgrading RAM, Harddrive, and Operating System to Windows 7 64 bit.
Reply 8 : Panasonic W8: Upgrading RAM, Harddrive, and Operating System to Windows 7 64 bit.
|
Originally Posted by toughasnails 
Rep to you....very good job
|
Reply 9 : Panasonic W8: Upgrading RAM, Harddrive, and Operating System to Windows 7 64 bit.
|
Originally Posted by Kardan
Just curious... a couple of times now I've seen one of the veteran members post "rep to you" -- I assume meaning awarding one of the "rep" power points in appreciation for a very useful post. But the posters "rep" total remains the same, as in this case where it is still at zero. Am I wrong about what is happening, or is there some missing step?
|
No comments:
Post a Comment